I’ve sold most of my backgammon boards that were featured in the previous ‘how to build’ posts. So I started another run, this time I have 27 board in process. As I read through my previous posts I thought I might add some info on the panel construction. I have a few more pictures to share. While my process really hasn’t changed much, it might be helpful to explain why I do some of the things I do.
Let’s start out with the parts for this run, just pictures of the panel parts coming together.
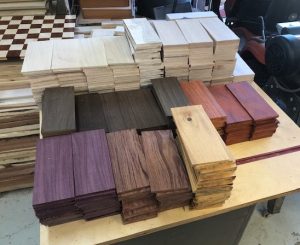
Exotic woods are always cool, but there are some properties that must be considered such as how hard woods you plan to use are, how much they move and will they exist next to one another well.
The big thing about cutting parts is organized work. Keep parts together and oriented properly for the next cut is important.
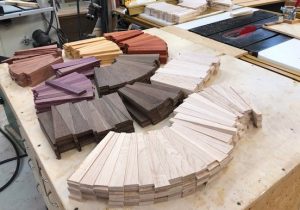
Here are the points panels taped together, I kept putting panels together until I ran out of parts. That is how I ended up with 27 games, and not enough parts to complete another panel set. I save the remaining few parts for various reasons, and sometimes they will match the next batch I make… but rarely… but it’s hard to throw away stuff.
Another look at the points panels, they still need squared, but one step at a time… Green painters tape comes off pretty easy after being pressed, if you use regular masking tape, you will fight removing it from your boards once they’ve been pressed.
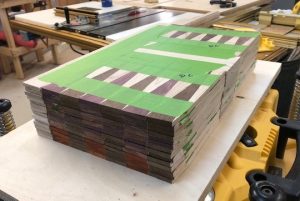
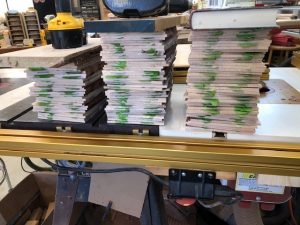
Panels are made, ready for the backer boards. plenty of tape…. nothing should fall apart. I don’t edge glue anything, however I have pondered that idea more than once.

Birch plywood is the key to good panel glue-ups. Birch plywood is getting harder to find, but don’t use any from the big box home stores, it’s hollow in too many places and won’t stay flat when glued and pressed. The plywood I’m using this time is 1/8″, seems very thin, but the whole panel ends up being about 1/4″ or slightly more thick. This keeps wood movement to as much of a minimum as possible and still be held together properly.
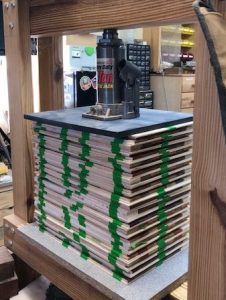
I didn’t show the first press of panels, this one is after they’ve set up and are drying. Glue makes wood expand, and since one layer is hardwood, and the other is plywood, they will move a different rates. If left laying free, they will warp. I put them in the press fixture as shown and leave them there for about a week. Once the moisture leaves the panels will lay flat as they were when glued the first time.
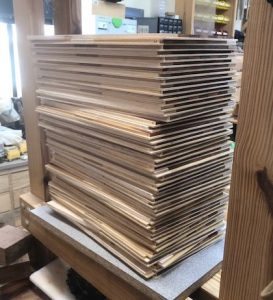
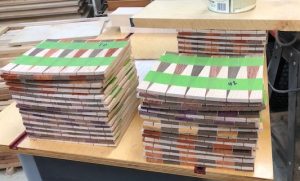
Here’s a shot of the panels with the pressure removed, they are fully dried and ready to panel sand. I learned that the exotic woods that I used like to be finished with sanding sealer before using polyurethane. I now coat the panels with shellac sprayed on to seal the wood. I don’t seal the tray area of the panel to allow the inner rail to be glued in. I use shellac that doesn’t yellow the wood, and one good coat is enough to seal for any other finish you desire.
The panels themselves need to be squared and prepped for the case work but that is covered in other blog posts.