I make a fair amount of backgammon games and other boxes that use mitered corners. I like to add decorative keys using a dovetail bit after the box is assembled, but to do that the corners need to be really tight and square.
In a past blog post I demonstrated how I do that on a chop saw and/or a sliding compound miter saw. That method works well so long as the box height is under about 4 inches or so tall. Once the box side goes higher than that, the limits of the saw show, not enough throat clearance to get the stock in place and make the cut. In getting around that problem I discovered using my radial arm saw for that purpose. Once I set the saw up, I left it that way for future cuts. (I rarely ever use a radial arm saw for anything).
A word of warning on radial arm saws. The saw I have as a regulated feed feature. I would not use a radial arm saw without this feature. It allows you to control the feed of the blade instead of having to push back on the saw to prevent it from walking over your material. This saw was one of the last generation of Craftsman saws that Sears sold, I bought this saw around 2001. Never use one of these saws without the safety features in place, guards, feed motors, etc., as you may experience severe personal injury. A sharp blade with a negative rake is advised for this type saw and the job we’re doing.
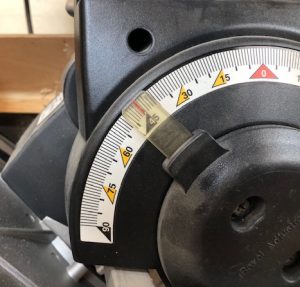
The first thing was getting my radial arm pivoted to the point I wanted. I made several cuts to get the perfect fit, dialing in a radial arm on a pivot is NOT as easy as setting it to 45 degrees and locking it down. The indicator on the saw is NOT that accurate. I used a bevel angle tool that helps me dial in incrementally to the place I need to be, which in fact is about 44.5 degrees. I did take a picture of where my indicator is on the saw, but it’s not good enough to just return there again if I need to reset the saw
The next thing to do is make an alignment block for the blade. I screwed a scrap piece of wood to the bed of the saw that was square with the fence, and cut it so the blade will always pass that point.
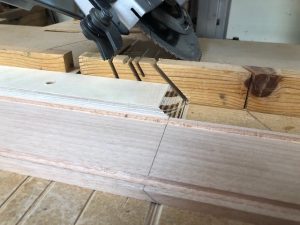
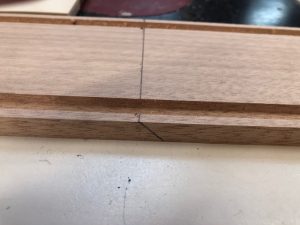
You can see the stock that is in the front of my alignment block, a pencil line across the stock aligns with the inner edge of the box. The birch plywood that I used for the alignment on the saw bed is stable and doesn’t seem to change with weather, but my shop is climate controlled with a consistent humidity level and temperature.
Now the next item is where to put the line, and how to obtain that alignment line so that the box panel fits properly. As with the other method, I use a scrap to figure where the panel will fit into the groove that I cut for the panels to fit into. I like to make this set of cuts one time, the box being square, allowing me to dry fit and make sure the glue up works, then glue the pieces.
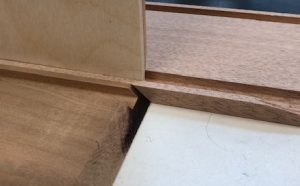
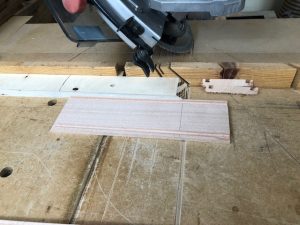
If you notice the dark ‘burn’ mark on the cherry scrap, it highlights the groove somewhat, that is what I am aiming to be at the end of the panel in the stock I’m going to trim to size. I pencil a bevel on the edge of the stock to be cut, then using a square make a mark all the way across the inner side of the material.
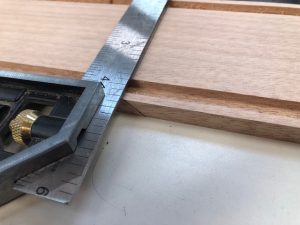
This line is aligned with the saw cut on my radial arm, and a single panel is cut. See picture below.

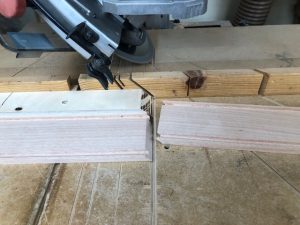
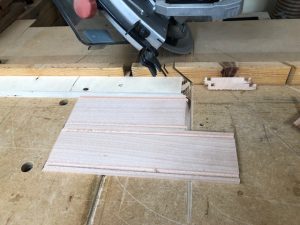
Now that the first part is cut, I can align the second to it and cut the next piece, leaving the first one in place, no marks are made on the second cut.
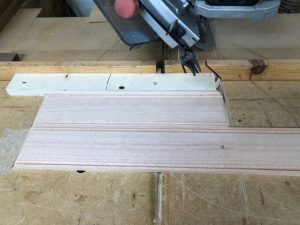
The reason for doing this is simple, the blade wants to cut and pull on the second board before the first one is completely cut, and it misaligns the second piece in doing so. I wait to make the second cut until the first board is cleanly cut. I’ve tried holding fixtures without complete success, so for a better fit, I make these cuts in two passes.
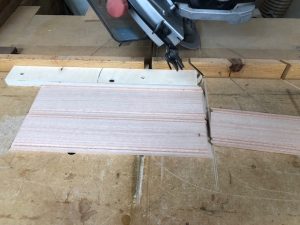
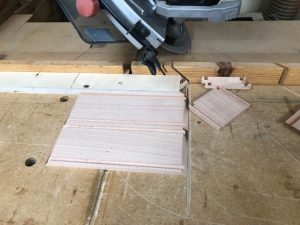
Now that the first (long edge) is done, I can now do the sides of the box. I turn the first cutoffs around and recut those for an opposite bevel than what was left behind before.

Then I assemble the front part with a cut off side and redo the fit line with the beveled cutoff as before.
Now we’re ready to make the final cuts on the short boards.
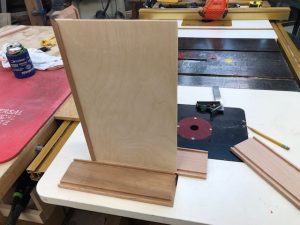
Next the box is dry fit together. I made a video showing the assembling of these parts and how easily they fit together if the setup is right. Taking a bit of time to fine tune the set up makes building several of an item easy. In this run, I did 27 backgammon sets, and was able to make all the casework and assemble boxes in just a few hours.
I hope you enjoyed this blog post, and even learned a little something useful, especially if you’ve got an old radial arm saw hanging around that you couldn’t find anything to use it for.