I have a few games that I make for online sale that features an engraved lid on thin plywood. I usually use Baltic birch for these panels as they have very few voids and carve well on my CNC. Here are a couple of examples…
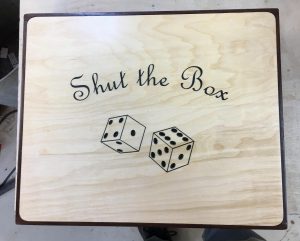
The one on the left is a finished box, the right is one that is in progress now, and has not been sanded and coated with any finishes yet other than the inlay black. You might notice that the corners are rounded. The lid panels sit in a groove that is rabbeted into the case using a small rabbeting bit. I also use a jig to round over the panels to fit once they’re sized to fit into the box.
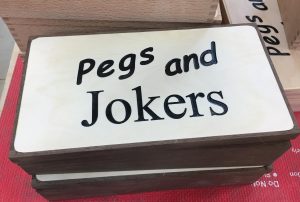
To begin with, the panels are close to the size I need when they’re engraved, but final sizing happens once the boxes are made and ready to assemble. This Pegs and Jokers game is like the one that is featured in videos below. Check out this video for more information on the lid and fitting it to the box.
You can see how the jig and a flush trim bit make quick work of a perfect fit between the panel and the box.
One thing that I learned in doing this is to make sure the bit is cutting in line with the grain, tear out on plywood happens when you try to cross the gain or reverse the cut against the grain sometimes, and you scrap out a panel you have worked hard to create.
The final clip shows gluing in the panels and preparing them to dry. Make sure you have already dry fit thee before applying glue, but don’t put both panels on together, you may not be able to get into the box to take them back out if you do. I’ve done that and it’s frustrating to try to pry out without damaging the panel you just forced into the groves.
Once the panels have dried, you can final sand the case and cut the box open to reveal the lid and lower case you created.