In the last post we taped together the lamination for the playing board, now we need to put that onto a plywood panel so we can mount it into the case. The playing board will be the inside and the backer panel will be outside. The outside needs to look really good so I buy Baltic Birch plywood which usually has two good sides, with the few exceptions of oval patches found on most plywood. There are far fewer with the panels of this quality. I am using 1/8″, or also known as 3mm. Since I’m doing several of these, I buy all sheets I need and cut them all at one time. I also recommend sanding both sides and and choosing the best side for the case outside panel. Mark the inside so you’ll know which way is up.

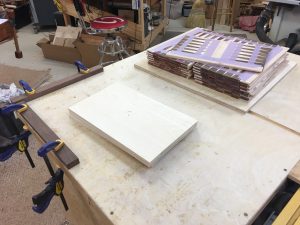
The picture above shows my panels ready for glue and the stack of laminations ready to be put to panels. In the corner is a clamped on pair of guides that are square at right angles and will be used to align the board and backer with one edge, the edge that is next to the storage area. The other three sides can be trimmed to size later on.
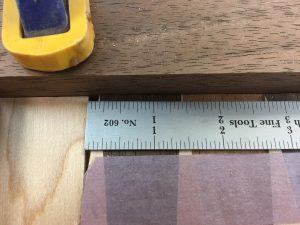
One of the stacks of panels had no gaps, and one has gaps. Those that have some gaps were made from panels where I didn’t make the larger ends, but planning ahead and knowing what goes onto the board later one will ease the worry of these gaps. In the picture below, you can see a close up of the gap with a rule showing how large the gap is, and I’ll show later on what we’ll do with that. Look at the top edge of the rule, we’re looking at about 3/16ths at the widest.

I apply a liberal amount of glue to the plywood and then put the lamination onto that smoothed out glue. For a demo, check out this video.
Once the glue is spread out the lamination is applied, and pressed down by hand. The tape that is applied is to keep the two boards from moving around when being pressed. I spread the glue by hand to be sure that I don’t have any dust or wood chips between the laminations to create a raised place that should not be. I have had rollers leave dirt and a bad glue up and by now we’re way to far into this for a mess-up. Once the panel is glued, there is no going back. Once the panels are glued and taped, it’s time to get them into a press, and we don’t have long to get it done. You need to have prepared some sort of press to do this, and my press is a part of my bench.
Here’s a tutorial of pressing, there are already two laminations in the press before the video started, I usually do three to four at a time, with wax paper in between the lamination panels and pressure panels. I like to leave these in the press overnight, these are in for 24 hours.
24 Hours later…
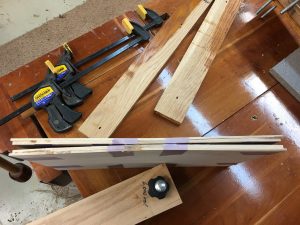
Here’s what the panels look like right out of the press, and don’t be alarmed, this is completely normal.

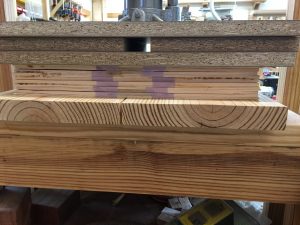
The reason they’re not perfectly flat like our press was is because the plywood and wood lamination are still somewhat wet. They need a few more days to dry, and will flatten out just fine once the glue is dry and all moisture has been released. I keep the panels in another press of sorts, one that I use to glue lamination inserts done on my CNC machine. These do not have to be perfectly flat like the first press, nor do they have to be all that tight, just pressed so they stay reasonably straight and can dry more. They need to be flat to run through the drum sander. Here’s a look at my second press. As I continue to make panels they will be added to the pile and at some point I’ll begin to remove them from the bottom to go through the drum sander. I would suggest a week to 10 days wait time for this step. If you want to rush it some, you can use thicker backing material, say 1/4″ ply.

Notice that the tape is still in place, I’ll pull that off before doing the drum sander, and might do it as early as my first look at the panels to see how flat they are. Sometimes I wait to just before going through the drum sander. The next post will be sanding, but it’s going to be a bit before the panels are ready. Stay tuned!!
