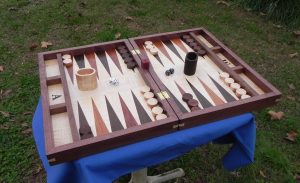
The above board is a custom request through Etsy, it is a larger board than I normally make, but the principals of making the board are the same. On the playing surface you see long triangle pieces in alternating dark and lighter colors as well as a light center field. Those are the parts I’m describing in this section. The playing parts are laminated onto a plywood backing board, usually about 1/8″ to 1/4″ thick depending on size of the board overall. The backer also serves as the outside case panel. I will be giving general dimensions in this post as the overall size of the board you want to make will change the geometry of the pieces. I will give stock sizes that I typically use.
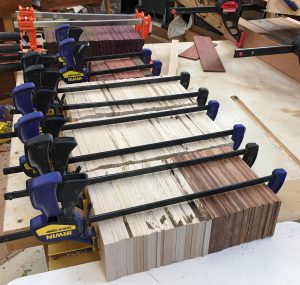
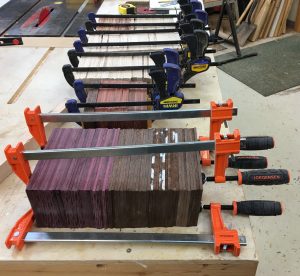
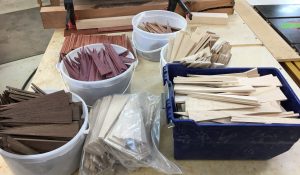
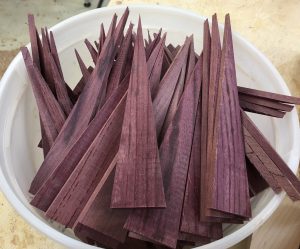
The first thing is to decide on the materials you want for the case and playing pieces. You need to plan ahead for all the species so they work together and look good. I make several boards at the same time, this particular run is aimed at 14 complete sets, so the pictures I post will show far more material than you will need for a single. For points, you will need 12 dark points, 12 light points, and 28 maple or other very light color. You will also need two center field pieces that are about 3+ inches wide and about 8+ inches long by however thick the material lamination is you work with. I make my own laminations and the thickness varies depending on how my band saw cuts each time. Now that we’re beginning, we need some thick stock to work with, needs to be at least 3″ wide, and long enough to get multiples of 7″ long pieces, so 3 x 14 or 3 x 21, etc. I’m using 3 1/4″ by about 30 inches long pieces, and they are about two inches thick or what is known is the rough cut world as 8/4 (Eight Quarter). My re-saw blade is from Highland Hardware and is a 3/4″ wide band made for the job, and is being used on a Rikon Bandsaw. You can’t do this on a benchtop bandsaw, it needs to have some power and a machine that will keep teh band straight through the cut. Once you re-saw the pieces in to about 3 x 7 x 3/16″ thick pieces, I run them through a drum sander to flatten them out some, not perfectly and not a final sand, you will do that later on. What you end up with is stock that looks like the pictures below. The one on the left is enough maple to do 14 board, the right is enough Purple Heart, Peruvian walnut, Bloodwood, and Chechen (Brazilian Rosewood) to do the dark points on 14 boards. Not shown is the center field panels and the end storage panel that will be shown later on. Another note, the edges of these squares do not have to be machined smoothly, they do need to be reasonably square, the most critical thing is the ends should be cut square to the edges. Each final square should be either 3″+ by 6 13/16″, you can use stock that is 4 1/4″ wide and get four points instead of the three that a three inch wide piece will yield. The purple heart pieces below are wider and you will see the cuts laid out for those later.
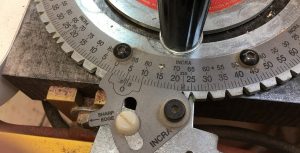
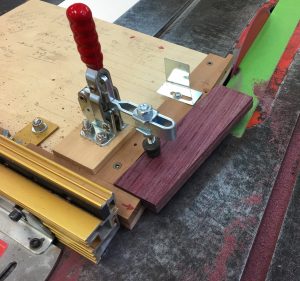
The jig that I use for cutting the angles is set up on the table saw using an incra miter gauge that will accurately go to 5.5 degrees from center. The cutting sled is bolted to the miter gauge, (I may redesign the sled later on). and has a toggle hold down for small pieces. It is far too dangerous to cut these holding with your fingers.
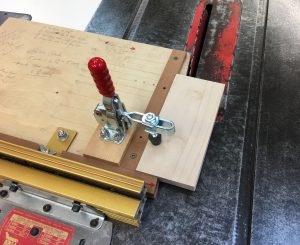
The above picture shows a stack of three ‘blanks’ held down for the first cut. Make sure the flat end is placed at the bottom of the stop and all three pieces are flat on edges touching the jig. The adjustment of the jig from the blade should be wider than the overall width of the final playing point. If you aim for points that are 1 1/8″ wide by 7″ long, you cut the first edge at something wider than 1 1/8″. I give another 16th or so, not too much, but enough to have a clean up cut on the second cut all the way down. If you miss this, you will see what the results is on the second cut, it won’t be a straight cut, it’ll run out of wood and have an uncut too narrow bottom edge.
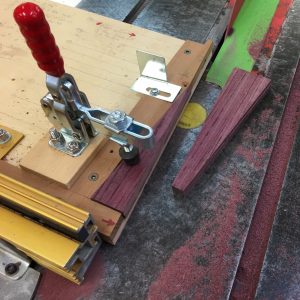
Cut all your first cuts at one time, cut the blank, take the cutoff and flip over and cut the second cut so that you end up with three triangles from each blank. One will be from the center of the blank, the other two will not look like completed points yet (another cut to make). Once you have cut all the points the first time, move the jig over to the final width of the points widest part, (I use 1 1/8″), and put the fist cut against the side of the jig having insert the filler piece as shown below.
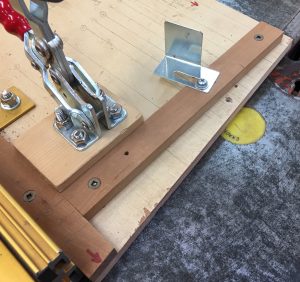
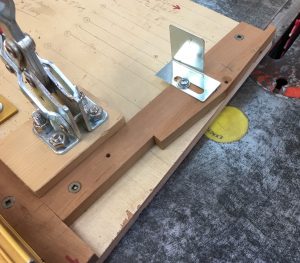
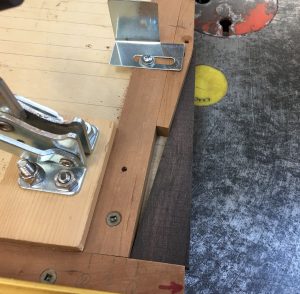
This piece makes the bottom fit flat against the jig and takes in to account the first 5.5 degree cut. You are aiming for the grain to center the playing point, so the total 11 degrees has to be divided between the sides of each point as shown in the picture at right above.
Now cut the other side of each point and you now have finished points. You should be careful when doing this cut as the offcuts are small, a zero clearance insert might be good, or as I did here put tape on the throat to keep pieces where you can move them away with scraps. Beware of launching offcuts toward yourself, it can happen!! As each set is cut here you can put them aside for use later on. Each point should turn out the same length and width, and should be uniform in fit. I also would suggest saving four maple end cuts for cutoff later in sizing the boards. I will show those when the lamination assembly section comes up. Here are my parts now ready for layout.
Earlier I mentioned wider parts, and making four points per blank. Here is a few pictures of how to lay out the cut for those after the first cuts are made. You will do the first cut and end up with two triangle like side pieces, and a parallelogram. That parallelogram yields two pieces, and requires two cuts.
Once the first cut is done, flip the cutoff and cut it to size as shown above.
In Part 2, I’ll show the layout of the points we made here and prepare for gluing to the backer board.
