This section is going to cover the layout of the points, the center field, and the storage floor panel. All these pieces are on the same level and are glued to the backer board at the same time. One thing we need to establish is making sure our parts are all made about the same thickness (or thin if you’d rather loot at it that way).
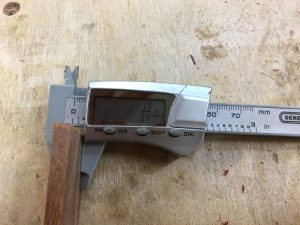
The picture is a bit hard to see, but the reading is about 13/64″, or ~0.200″. I like to use decimals for this kind of thing, and my parts are about 0.19″ – 0.21″, almost enough difference to see, you can feel it when the parts are laid next to one another. They can vary more than that, you’re going to sand the board after it’s glued up anyway, so may as well save sanding work for when it’s going to really make a difference. Another thing we could use is a jig, I made one that is like a lectern, and has a stop that is angled at 5.5 degrees on the left side. I also have a video posted below explaining some of what is done in this section.
You will need to have your stock ready and close at hand, have some sandpaper (I like to pinch a piece under the jig to touch up any of the points as they go together), and some tape that is good for holding but will also come off easily. The reason for that is we’re going to put the tape into a press and pushing on it with a lot of force will make the glue that much harder to come off, and will gum up your drum sander, or whatever sander you’re going to use later to flatten the panels. I like the purple tape found at Lowes in the paint section, for delicate surfaces. It doesn’t hold really tightly, so be careful with the panels once they’re assemble and before they’re glued on.
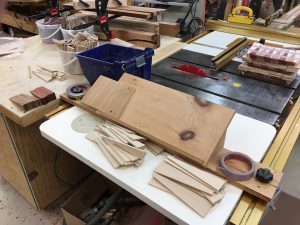
You will notice here that I have already been making panels (upper right of picture) and have my next set of points ready to go in front of the jig and to the left side of the jig. You need 28 light points and 12 of each light and darker colors in contrast to maple. The next ones used in this are Bloodwood and Chechen. You should make all four panels exactly the same, same order of parts, same colors/species of wood in the same order each time. They are to alternate when the board is assembled if done properly.
Check out this video for a quick demo of making the points panels.
The goal of making the panels is to make them uniform, also make them square with the edges cut off so that we can mount the board into the case material. Some of the decisions made now are going to affect how the project goes together later on, I’ll try to project reasons as we come to them. The next thing is to square up the edge that goes against the center field panel, and we need to make sure we cut all the panels the same length, so I put a sled jig together and made it so that I can cut all four of the panels at one time. You have to be careful that things are square in jigs from here on… it makes a difference. Some edges we’re going to allow to be off a bit because we need to fit panels later, but some need to be right at this point. This first cut needs to be right.
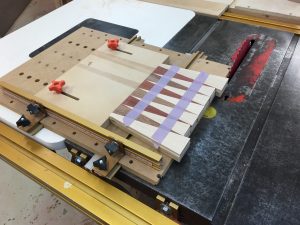
This jig is an Incra Jig kit that makes a lot of different sleds, and is really adaptable to whatever sled needed project I have. I also made a backer board that fits on to the sled with bolts and thumbscrew knobs. When you begin this cut, make sure you have a good sharp blade. I have a new Freud thin kerf combination blade. This kind of blade does not have tear out, cuts very cleanly and works great for this kind of project. It is also critical to put something on the top of this panel to hold all the parts down, they are held with not strong tape.
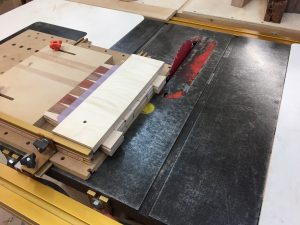
Do I need to mention that you’re going to have to really watch your hands here? I watch where the blade is at all times, and watch where my hands are, if you aren’t comfortable holding the panel down by hand, fix a jig to hold it down somehow. Make the cut and make sure all the panels are cut off, but don’t cut the dark points more than is necessary. You may blunt them slightly, but don’t cut them off more than you have to. If you’re making more than one of these as I am, cut all panels before setting up for the next cut.
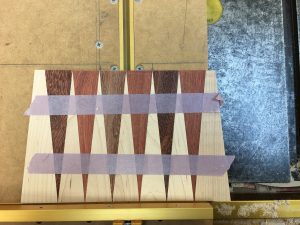
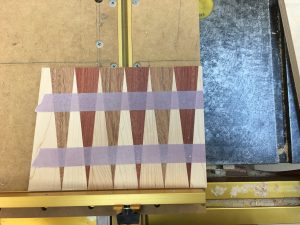
The above picture on the left shows my alignment location for points to cut the board where I want the right angle edge to be. The second is the cut made. This is one that I did the panels one at a time, It is critical that this panel is centered, so all the side cuts are measured from the center line of the panel, the center of the middle maple piece. You can see that the center maple point is pointed at a gap in the panel, therefore I had to measure side points and reference those, which will end up with slight variances in the side cut alignment, but that can be adjusted for later on. This isn’t critical at this point, however you don’t want to be a lot off here. Once again, cut all the panels before you set up for the next cut which is the other side, making all panels the same width and centered (or really close to it). I set up the jig to have the fence above the cut and create the other side edge.
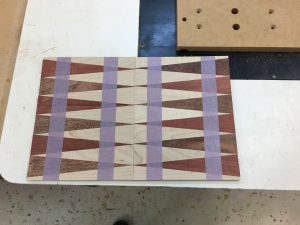
What we end up with is something like as shown above. Alignment is good, now we’re ready to add the extra two fields. The center panel and storage panel is correct width, but not length, we cut those down to fit the board once we’re square and points aligned properly. Any centering adjustments are made before we fit these two pieces. They lay out like the picture below.
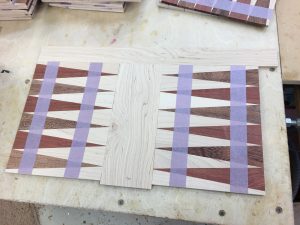
The next post will show fitting the final pieces, taping them together and placing them on the backer board for pressing.
