We’re ready to make the backgammon case, so we’re going to begin by machining the panels. We made flat stock in the previous part, so now it’s time to put the panels together. First we need to get the panels approximately the right length. I am cutting an approximate 45 on the ends, knowing they are going to be too long but doing that on purpose. To cut the ends, I’m going to use my miter saw, and you can make very accurate cuts on such a tool if you take the time to set it up properly. I used gauges to set up the saw and adjust the markings on the scales to match true angles. I am including some pictures of my saw’s set up, you will notice that the gauges for one side are not on “0”, but the other side is, and the miter is not exactly 45, I go about 45.25 degrees for fit.
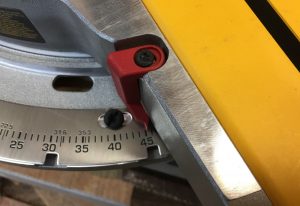
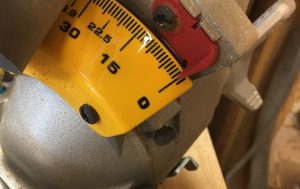
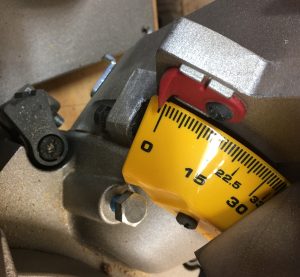
The saw also has a fence that is adjustable and I put a board there that I can cut away with the blade to make my miter cut exactly.
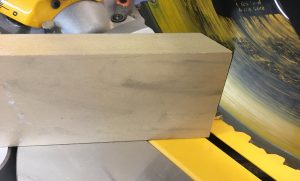
This fence is bolted to the adjustable fence of the miter saw, and can be cut and re-cut as needed. When I mark the board, I align it to the edge of the fence for a very true and accurate cut.
We need two lengths of boards, two that are as long as the panel and two that are as wide as the panel, or slightly bigger as mentioned before. I measure so that the inside of the box is greater than the panel. Once these are cut we can do the dado slots for the panels to sit in when the case is glued together.
There are several ways to make dado’s. One is a dado cutter in a table saw. I don’t do that because these slots are so thin, and I need to sneak up on width. The second is with a router bit in a router table, but there are only standard sizes and I am not working with those, nor do I want to try to sneak up on width with with router bits. The third way is to use a standard table saw blade and cut the slots one saw blade width at a time. I use a thin kerf blade and that allows for two or three cuts that stay within the thin slots sizes we’re working with. One panel I have is 0.230″ and most are 0.285″. There are no router bits of that size, and table saw blades and fence adjustments are easiest. I also have a micro adjustment on my fence so I can adjust in thousandths of an inch and sneak up on the final fit between the panels and the case. I use a scrap board to test fit before I cut the actual panel to ensure that I don’t cut too wide.
Here is a short video that explains using the test piece and the slots in some detail.
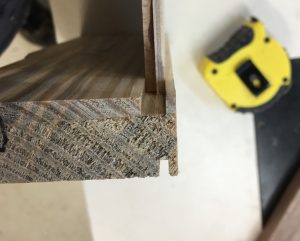
Next, after cutting our case dado slots, we’re going to begin the final fit of panels for length. I put the panel into the slot on one side and mark the exact length on the other end using a second case piece to find the miter location.
Here is a video that shows some details before we glue things together.
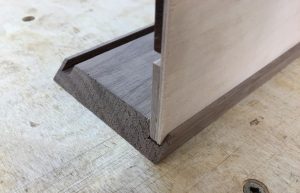
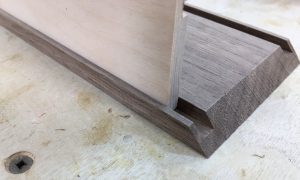
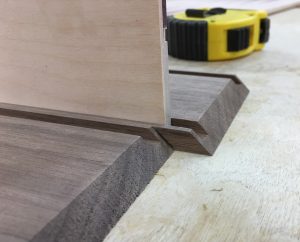
When I mark the cut point, I cut slightly too big, maybe the width of the pencil line too much. This may be cut off later, but usually allows for glue space. The final fit should look like the left picture on both ends, as well as the short pieces. When the fit is right, we get a box that looks like the picture below, and I always do a dry fit before gluing anything.
Here is a video that shows gluing the panel and explains why I put glue where I put it.
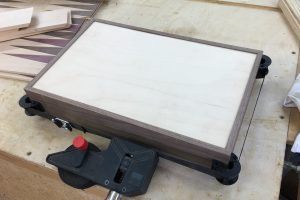
This box is glued and ready to dry. Once it has dried for a few hours we can cut the dovetail keys. These are to strengthen the mitered corners and to add decoration to the case. I like to use contrasting colors on the keys, such as maple with walnut as we have here. When the case is dry and unclamped, we will sand it with a random orbit sander to make the corners smooth and clean off any glue that came out during clamping.
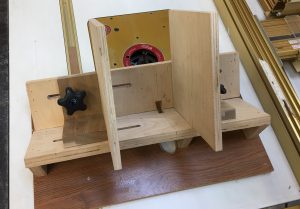
There is a jig that I made to do the keys, it involves a dovetail bit and router table, and a holding device to keep the case at a 45 degree angle to the bit. The bit needs to protrude through the jig high enough to almost cut through the case, which means we’re going to cut almost a half inch in depth. The bit here must be the same bit we used to create the key stock we’re going to put in our slots.
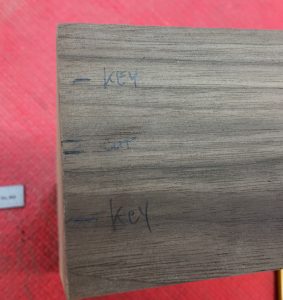
We need to locate the slots we’re going to cut. They need to be centered on the panels we’re going to end up with. The case will be cut apart after our keys are complete, so we need to allow for that kerf and center on the stock we have left. In our case, we center on a 1.5″ panel section and have a 3/16″ kerf allowance.
Here’s a look at the jig for cutting our keys. You can find a similar jig online at Amazon or Eagle America online. You must use the same router bit for this cut as you did for the spline cuts.
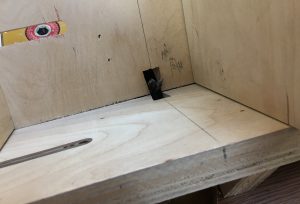
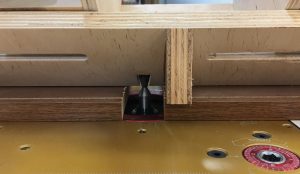
Here is a video that shows a little bit about the jig.
This video shows cutting the keys with the jig.
Once the jig is set up, we should be able to cut all 8 of the keys slots by positioning the case in the jig in the right place. The pictures below show aligning the case to the jig.
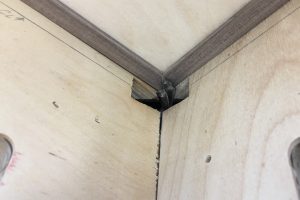
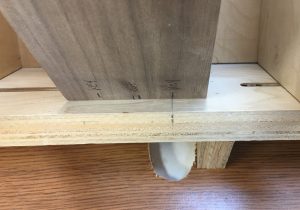
Once our key slots are cut we can glue in our keys and let them dry. Here is a video clip that shows installing one of the keys into the case.
Now that our keys are dried, we’re going to cut them off close to the case on a band saw. Check out this video for a quick look at how I do that.
Next I’m going to use a belt sanding station to smooth the key stock to the case stock. It is hard to get pictures of this, so video will do here too.
This is what we end up with after sanding. These keys help to hold the miter together and add a bit of elegance to the box. The contrast will be much better when finish is applied.
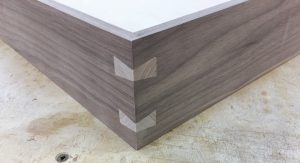
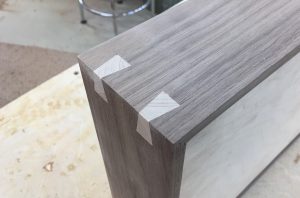
We can sand the case sides at this point, I would recommend this as the case needs to be matching in every way when closed. When the case is sanded to about 220 grit, we could apply finish. I don’t sand to much finer than that most of the time, as the first coat of finish will raise the grain, the second coat of finish gets a finer sanding grit, usually 320 grit, but we’re not ready for that yet.
We need to prepare to open the case up into two halves. I cut this on the table saw. I have seen a band saw being used here, but blade wander makes the cut not as perfect as it needs to be. I re-marked the lines we used to lay out the keys which included the kerf cut. Those have been removed by machining and sanding, so need to be redone. Notice how closely the blade is centered in the marks, this is important for getting the halves to be exactly the same thickness when cut open.
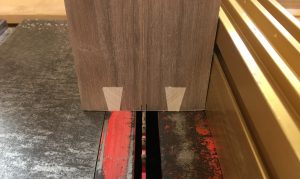
We also need to adjust the blade height to barely cut through the box. We don’t want to have stray saw marks. Sanding the case where this cut is made needs to be minimal, we don’t want to remove very much stock here, matching across two parts is eye candy.
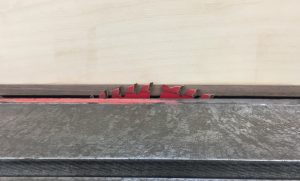
The blade needs to barely go above the inner case material, we’re going to cut one edge at a time, and must keep the same case half against the fence at all times. The last cut will open the box, so we need something to prevent saw blade capture, I use a thin strip of material to make the box open away from the blade when the case comes apart. The picture below shows this thin scrap strip, it is almost 1/8″ thick and long enough to go through the box.
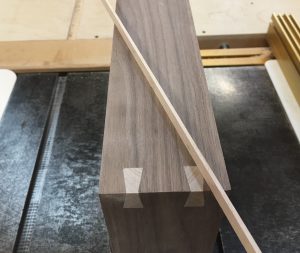
Here’s a video of cutting the box apart as viewed from the back of the saw.
When the case is opened up, we can lay the parts side by side and see how accurate we are in all our steps. If we’re successful, the case should turn out like is shown below.
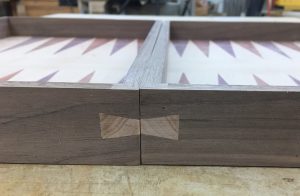
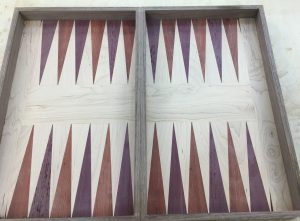
The left picture shows the thickness is very near the same, and the keys are aligned. They will be as you see them when we add hinges and open the case to play the game. The center edge also needs to be very flat against one another for the hinges to fit properly, and the case to open without looking uneven. If you look closely, you can see our center field grain matches across both playing boards as though this was one continuous piece (which it was to start with). Now we’re ready to add the small pocket dividers and begin the finishing process on the board.
